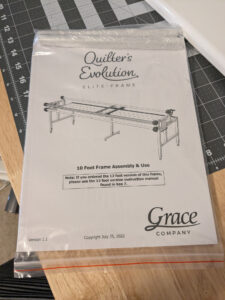
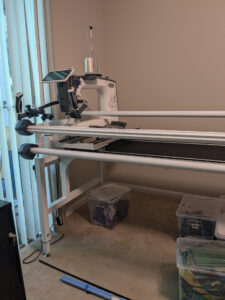
I was so happy to welcome the Quilter’s Evolution Elite Rolling Frame into my sewing room in November! You can purchase it as an 8-foot, 10-foot, or 12-foot frame. I have the 12-foot version. Purchasing the 12-foot version is the best option because you don’t HAVE to set it up as a 12-foot frame. It’s a 10-foot frame in my sewing room. The box with the pieces needed to set it up as a 12-foot frame is in storage. It’s waiting for me to have more room for it!
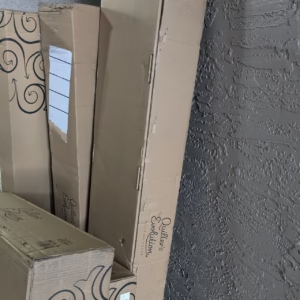
I was so excited the day it arrived that I took pictures and videos of the box—just the box! My husband laughed at me, but it was so exciting!
The frame had to stay in the box for a day or so while I cleaned up and reorganized my room to prepare to put it together. I had taken over the living room of our apartment with all my sewing, quilting, and embroidery setup. The living room had to be reorganized again to ensure there was room for the frame.
Organizing My Sewing Room
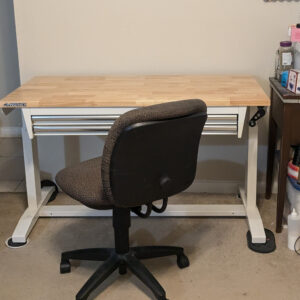
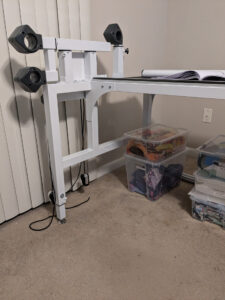
I had to remove my desk and the Ikea dining room table I used as a sewing table. It worked out well because I now have my Husky table, which I used for the Cutie frame, as a combination table. It holds my laptop on a swivel base, my sewing machine when needed, and my cutting mat full-time.
My printer stand and embroidery machine stayed in the same location. It was great not having to move everything around all at once. My ironing board fits in front of my frame when I need it. When I don’t, it folds up and gets moved out of the way!
Under the frame, I have ample space for fabric bins, WIP bins, and storage for my embroidery supplies!
Putting the Frame Together
Like all the other Grace products I have purchased, the Evolution frame came with extremely detailed instructions and photos! It was not hard to put it together. Just ensure you have someone to help hold things, as the frame is very sturdy and heavy.

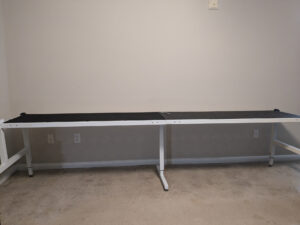
It took me a bit to get it leveled so that my machine wasn’t moving around, but it wasn’t difficult. It was time-consuming to adjust one foot of the frame, go back and see if it was enough, change it a little more, check again, and repeat the process over and over. Then, when you finish with one side of the frame, you have to do the other side. It was well worth it, though, since now I know it is level and that my 19x Elite machine will stay where I put it.
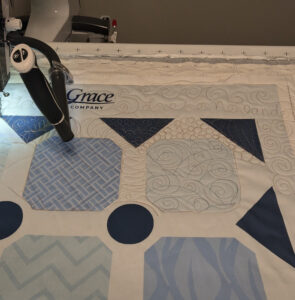
Practice Panel
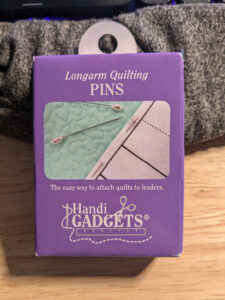
I was excited to see that the frame comes with a practice panel! I already knew what my 19x Elite could do, but practicing pinning backing and the quilt top to the leaders was nice. These HandiQuilter pins (Yes, I agree, the Grace Company needs to come out with some!). They are large and very sturdy to hold everything onto the leaders well. There are other options for attaching leaders, such as Red Snappers or zippers, but for now, I will continue to use these pins.
It was fun to play with the practice panel. I had no worries about what I was doing and no concerns that I would mess something up, and it was freeing to stitch to my heart’s content!
I’m still getting used to the frame, and I have so many ideas for quilts that I want to make so that I can quilt them! It had been a long time since I had quilted anything before quilting the Grace Community Quilt. I loved my Cutie tabletop frame, but I knew I could fit a larger frame in my room and was waiting to upgrade. I focused a lot of my energy on making more embroidery bags, so I hadn’t been making quilts in a while. Now I realize I should have also been trying to make more quilt tops because I have so much space to quilt and no tops to quilt!!
I am actually in the process of finishing a few quilt tops so that I can get them on the frame. I can’t wait to show them all to you.
Thanks for reading and happy quilting!
Didi